“The only people nostalgic for the days of tape are the ones who never had to work with it.”
That’s what one of my professors told us on day one of our last day of the highest level of our Recording Techniques class—the one where we started using tape. Yes, it was an advanced class, so why wasn’t it touched on sooner in the curriculum? Because by that point in time (2012), tape had been all but phased out of the typical modern recording process.
But if you haven’t noticed, tape hasn’t really gone away…at least not for engineers lusting after the characteristics it imparts to their sound. That’s what we’re exploring here.
Should you integrate tape into your recording workflow? I don’t know. Only you can answer that. What I can do is offer some perspective, some pros and cons, and some questions you should consider when thinking about working with tape as a medium. Let’s examine some of its sonic characteristics, how it compares to working with digital audio, and why you might want to consider adding it at some point into your process.
Analog Tape and the Digital Comeback

For decades, analog tape was the de facto recording medium in the music industry. It wasn’t until digital recording technology started creeping in and getting better that people started to realize that there might be a future beyond this tedious, expensive, and time-consuming audio standard.
So if recording to and working with tape is such a hassle, why is it such a hot topic in the recording community? Well, because it sounds good. Damn good.
As workflows shifted to entirely digital processes away from analog-based methods, things like the saturation and harmonic distortion from analog devices was lost. Once the novelty of the convenience of digital recording wore off people started to notice something. Sure, it’s much easier to work with than analog tape, but it was missing the vibe—the “mojo.” That mojo can be broken down into three primary components.
Harmonic Distortion
When it’s said that analog tape adds harmonics, what’s really happening is the introduction of harmonic distortion. These types of harmonics come in two varieties, second order and third order.
Second-order harmonics are even-numbered multiples of the fundamental tone. These harmonics are in tune with the fundamental and are very musical. Third order harmonics, on the other hand, are odd multiples of the fundamental. These stand out a bit more, with a more “jagged” and “edgy” sound. In fact, too much buildup of odd-order harmonics can be downright nasty…and not in a good way.
Second-order harmonics are most commonly associated with the distortion of vacuum tubes, while the third-order variety usually comes from analog tape, transformers, and discrete solid-state gear. It’s important to keep in mind that very rarely will you get only one or the other. Both varieties are usually present to an extent, and the ratio between them is what determines the sonic character of the distortion.
Having a basic understanding of which type of harmonics you want to add can inform your production workflow. Looking to add some warmth and roundness? Try going for processes that tend to emphasize second-order harmonics first. Need a little aggression? Start with processes that tend to emphasize third-order harmonics.
Compression
Tape compression is another pleasant side effect of the medium. In an entirely analog workflow there are multiple variables to it, including the tape machine’s bias, the type and size of tape, the combination of the machine and tape, how hot the signal hitting the tape is, etc.
In general, the hotter the signal hitting the tape, the more compression is introduced. It’s a very musical, subtle, and organic kind of compression that fattens the signal up, rounds off transients, and generally makes whatever it’s effecting more “present.”
Saturation
By pushing an analog tape signal above 0Vu, the most miraculous thing happens: you achieve tape saturation. In essence, this adds harmonic overtones that weren’t originally present in the signal. These additional harmonics add life, vibrance, and a sense of “fullness” to the sound.
As you’ve probably heard, there are different types of saturation. Tape saturation tends to produce harmonics that are rich and very musical. It can’t be overstated the difference between pushing an analog signal into saturation versus pushing a digital signal into clipping.
Virtual tape saturation plugins recreate the sound of pushing a tape signal into the red (not a bad thing in the analog world!) and causing distortion. These types of plugins usually offer all kinds of saturation, including tape, tube, even transistor. Saturation might be the most popular analog tape effect. It’s an especially good way to liven up digitally recorded tracks without it becoming too distracting or overdone.
Why Record to Tape in 2024?
So, why would anyone want to record to tape today considering the seemingly endless possibilities that digital audio provides? The first reason is just what we outlined above. Tape imparts a certain sonic quality to the sound you just can’t get naturally with digital audio. It is warm, pleasant, and well rounded from a frequency perspective.
Digital audio is the opposite. It is a relatively neutral homogenization of 0s and 1s that isn’t meant to do what tape does. But that’s not a bad thing!
If you’re planning to add an analog tape component to your recording setup, keep in mind that you’ll need a few pieces of gear. You’ll need to find the right tape machine for you, keeping track count in consideration. You’ll need to source the tape, which can be expensive and difficult. You’ll also need something to get the signal onto the tape, like a mixer or outboard preamps.
Let’s look at some of the benefits and drawbacks of recording to tape.
Pros of Working with Analog Tape

[Above: detail of an Ampex ATR-102, a popular choice for printing master tapes. Image via Perfect Circuit's archives.]
As difficult as it is to source and work with, tape has a lot of upsides. It introduces pleasant sonic qualities like additional harmonics, compression, and saturation naturally instead of using a plugin that’s just modeling them. These factors also mean you’ll have to do less processing to introduce them.
Recording to it puts a focus on the performance, and due to the limitations of working with tape, more focus is placed on capturing the best takes instead of relying on post production or a “fix it in the mix” mentality.
Tape is also fairly forgiving when it comes to things like transients. And editing headaches aside, once you get into the headspace, you might find the overall picture coming together more quickly than it would “in the box.” It also provides a more tactile workflow than digital audio, which is appealing to many.
Overall it provides a classic, retro sound that is highly desirable—even if it can be difficult to source the equipment and work with it.
Cons of Working with Analog Tape
That said, there might be more cons to recording to tape now than ever before. First is the issue of availability: magnetic tape is expensive and increasingly hard to find, as the recording world leans full-tilt into digital audio. Tape is also notoriously tedious and difficult to work with.
Then, there is the separate issue of the tape machines themselves. Acquiring them, performing routine maintenance, and making sure they are set up properly by performing calibration and biasing—it takes a certain type of acute technical knowledge when it comes to using them, knowledge that is moving more and more into the past.

[Above: image from the Ampex 350 manual.]
Tape machines and tape are increasingly hard to find and expensive to maintain. Tape also degrades over time, and every time it’s played…which leads to eventual loss of fidelity and potential loss of the tape entirely. The medium can also be noisy, which could be a good or bad thing depending on how you look at it.
If you’ve only worked with digital audio, you’re used to virtually unlimited track counts. Tape is very limited in this regard. And editing…oh, the editing. It takes a fine touch to edit tape, and it’s always destructive as compared to the non-destructive editing of digital audio.
There’s also the issue of integrating digital processing. If you’re working only with tape, you’re limited in what type of processing you can do. And though it was listed as a benefit, the necessity for getting the proper takes without relying on editing and post-processing can be a detriment depending on how you work.
When it comes to integrating tape into a recording workflow, it’s important to balance nostalgia with the practicality and advantages of working with digital audio.
Analog Production Workflows
So, how do those working with a hybrid studio (using both analog tape and digital audio) factor in the analog element to their setups and production flows? In general, you’ll mostly see tape being used during the tracking phase of the production process. The reason tape is used for tracking is that committing the initial tracks to analog tape imbues them with all of the “analog magic,” including harmonic distortion, tape saturation, and compression.
There are two main categories of tape machines: reel-to-reel and cassette. Reel-to-reel is exactly what it sounds like, the machine with the two reels (a feed reel and a playback reel). Cassette-based recorders are the compact “portable studios” that were popular in home recording about 25 years ago, popularized by companies like Fostex and Tascam.

[Above: the Tascam Portastudio 424 multi-track cassette recorder; image via Perfect Circuit's archives.]
In the ever-fading all-analog recording process, everything is done via tape. The tracks are recorded to tape through a mixing desk, recording console, or directly from preamps. Editing is performed through an arduous process, and mixing is performed from the tape playback (and you thought working in Pro Tools was hard!).
In reel-to-reel tape applications, the size of the tape matters, and there are three sizes: 2”, 1/2”, and 1/4”. In a professional situation, individual tracks are usually laid down to 1/2”, edited, and mixed, and then bounced to 2” for mastering. 1/4” was often used on less expensive tape machines.
A cassette-based method is largely the same concept, except certain elements are different. For the most part, you can’t edit in the same way, since the tape is contained in a plastic cartridge. Cassette recorders also use a special, high-bias cassette.
The biggest issue with recording to tape today is finding the right equipment. Manufacturers don’t make them new anymore, so you’re relegated to scouring the used market for gear that’s decades old in the hopes it’s been kept in good condition.
If you’re going this route, how do you know which method to choose? If sound quality is your biggest priority, don’t even bother with cassette. Reel-to-reel is what you need. Beware though, it’s a rabbit hole. You need the tape machine itself and something to get the signal(s) into it like a mixer, console, or external preamps. Then there’s the upkeep and maintenance. All these factors start to add up quickly.
The cassette method is easier, but definitely won’t produce "professional" quality. It’s more of a way to document ideas—but, that’s definitely not to say professionals haven’t used an inexpensive cassette recorder to make records. Elliot Smith used one on Roman Candle; the Elephant 6 Collective bands (including the Apples in Stereo, Neutral Milk Hotel, and the Olivia Tremor Control, among many others) made extensive use of multi-track cassette recorders; and Bruce Springsteen recorded his stripped down Nebraska album on cassette.
Hybrid Production Workflows
A hybrid workflow is much more common. This means that there are elements of analog tape and digital audio used in the overall production process. Usually this means the tracks are recorded to tape and then transferred (bounced) to the digital realm for editing and mixing. Sometimes mastering is done digitally, sometimes the tracks are bounced back to 2” tape for analog mastering.
The point of a hybrid workflow is you get the best of both worlds. You get tape’s sonic signature, while keeping the headaches of dealing with it to a minimum by incorporating the strengths of digital editing and mixing.
Tape Effects Through Plugins and Outboard Hardware

[Above: Images of Universal Audio's Ampex ATR-102 plugin, a great-sounding emulation of one of the most popular mastering-oriented tape recorders of all time.]
There are countless plugins that are meant to provide the harmonics, compression, and subtle saturation of analog tape without the hassle of having to actually use analog tape. Some are meant to virtually simulate using an actual tape machine, some have packaged presets for accessing sounds like tape saturation and tape compression.
They sound great as it is, and as plugin technology continues to evolve you can bet their efficacy will only get better.
Additionally, there's plenty of outboard hardware and "color boxes" out there designed to emulate the saturation of tape machines. A recent favorite at Perfect Circuit is the Warm Audio WA-MPX and WA-2MPX tube preamps. Based on the Ampex 351 preamp circuit using high-quality components throughout, it's a great way of adding some tape-era color and saturation to your sound. It's more about leaning into the sound of those Ampex preamps than the sound of the tape itself, but devices like these can get you into a similar sonic ballpark.
Winding Up
If the resurgence of the popularity of vinyl records in the past few decades is any indication, the love of analog recordings isn’t likely to wane anytime soon. It’s proven that the enduring appeal of the sound qualities of analog tape will continue to be sought after for the foreseeable future.
Recording to tape certainly has its limitations. But innovation is born from limitations. It’s an expensive buy-in, but one that might be worthwhile depending on how you like to work and how you want to build out your recording setup. The reality is, in the modern music production landscape there is no shortage of options. You don’t have to deal with antiquated, expensive, and high-maintenance technology to achieve the same sonic effects.
But that doesn’t mean there isn’t value in considering it.
Brandon Stoner is a lifelong musician and audio engineer who owns more guitars than anyone needs. As a lover of all things writing and music technology, he crafts every piece with his dog Max on his lap.
Portfolio | LinkedIn | Twitter
Great Tools for Adding Tape-Era Sound to Your Studio
 Warm Audio WA-2MPX Dual-Channel Tube Microphone Preamp$1,399.00In Stock Available immediately!
- Warm Audio WA-MPX Single-Channel Tube Microphone Preamp$749.00In Stock Available immediately!
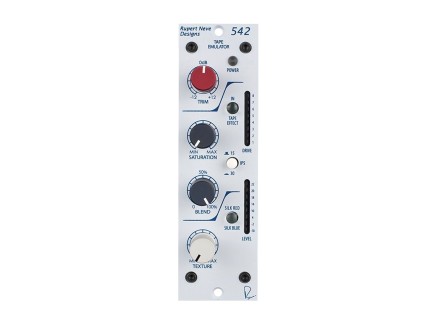
- Rupert Neve Designs 542 500 Series Tape Emulator$849.00Backorder Reserve your order today!
Out of Stock
We're awaiting our next batch of this item. Pre-order to reserve your place in line and we'll fulfill your order as soon as we receive our shipment